Installation Quick Tips
Instructions on how to build your Silca System deck
New construction quick tips
- Determine finished surface height.
- Determine the thickness of the paver or tiles being used. min 14mm. Most Popular is 20mm Porcelain.
- Build your deck substructure with joists placed at 400mm centres. Make sure joists are dead flat, straight edge and electric plane if needed. We recommend KD (Kiln Dried) exterior use treated H3.2 timber. (refer to joist span/paver thickness tables)
If tiles are grouted, fall for water run off required.
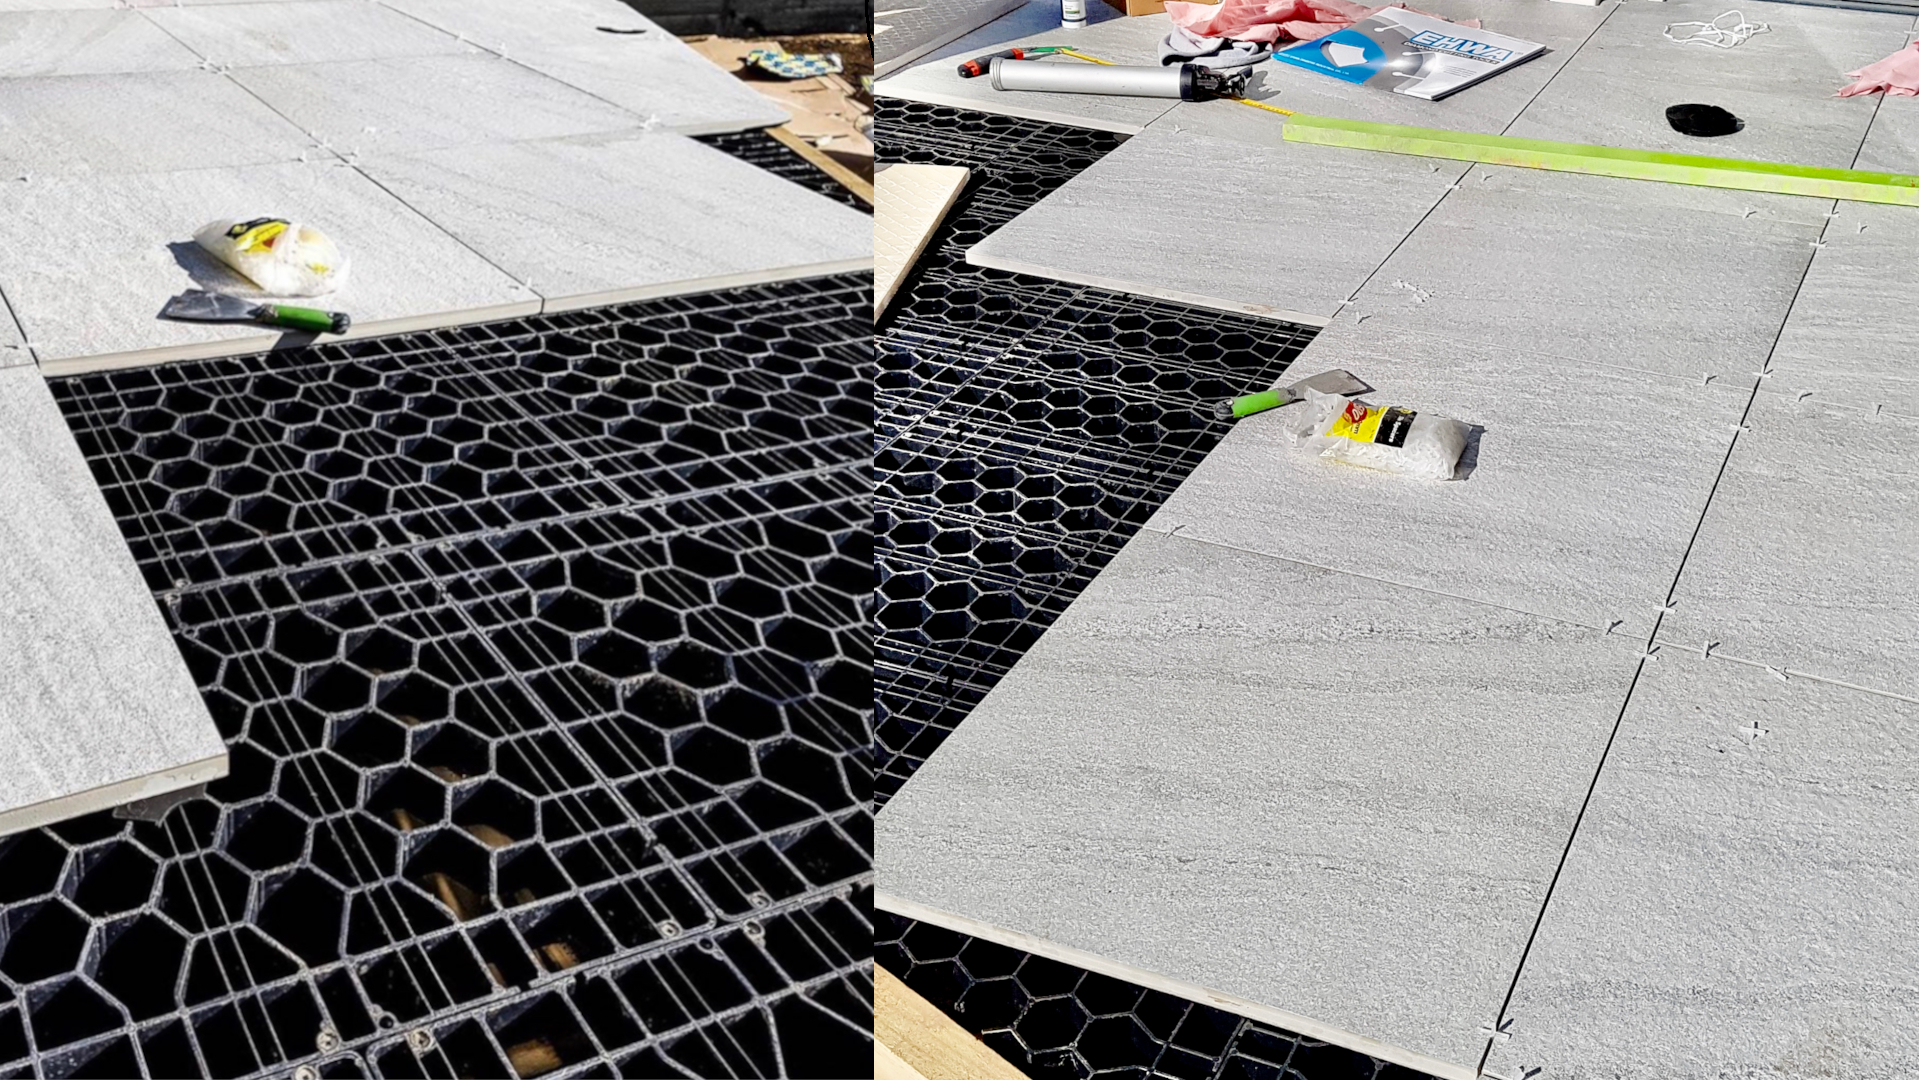
For a permeable finished surface, tiles can be laid with 3-5mm gaps and deck substructure can be built level, this also achieves level entry through door thresholds. - CAUTION: Deck construction should be in compliance with the relevant local building code.
- Place the Silca Grates on top of the joists butted up to each other with the edges of each grate sitting on the centre of each joist. Insert connectors and nock in as you go. If creepage occurs, subtly adjust layout to suit so the Grates remain centred on the joists. Make sure the strength bands are spanning between the joists.
- Screw down the Silca Grates. Use six (6) 10g x 75mm Stainless Steel countersunk head wood thread screws per Silca Grate(Test screws for a firm fit. Do not over tighten)(Screws can be supplied as part of your order upon request, for both timber or aluminium joist applications.).
- (optional) Install Geotextile blanket (ONLY if you are going to use Polymeric sand or grouting between the joints of your pavers).
- Spot glue fix your pavers/tiles using 3-5mm spacers for drainage or grout. (Be sure to plan the layout accordingly) Some good “key” areas are around the screw head/grate junctions and connectors. Multiple glue dobbs about the volume of a plastic coke bottle cap work well. (For adhesive we recommend the Wedi 610 adhesive. This can be supplied as part of your order upon request)
- To finish you could choose to cover the perimeter/trimmer with a facia of timber, aluminium, or your choice of paver using a suitable adhesive.
Download Resources
To help you further, here are some more detailed resources on how to build a Silca deck. Please click on the links below to get further information.
Install Guide Specifications
LOOKING TO PURCHASE SILCA SYSTEM FOR YOUR NEXT DECK?
Every Project is different, so please contact us for a quote.